Setting up the bot
Setting up the bot in your server via the Dashboard.
Preferences
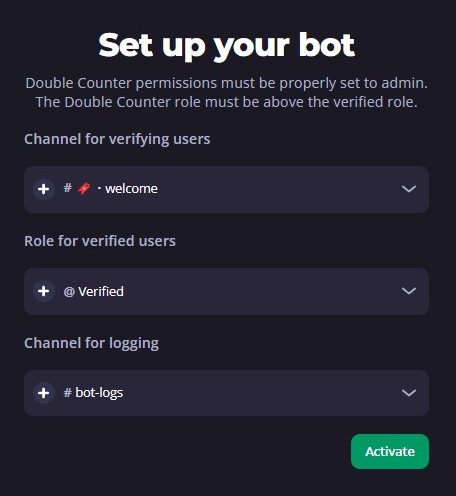
This section of the dashboard acts as the initial setup wizard. If any changes are made and saved here, it will default any settings changes made in the Configuration tab.
This section of the Dashboard is used to complete the initial setup.

Channel for verifying users
Select a channel you wish users to see for verification and verification instructions. Upon a successful detection, this channel will also be used as a temporary notification channel, informing the user they have failed verification due to an Alt Detection or a VPN Intrusion. Notifications are temporary and will self-delete (providing the bot has manage_messages permissions) after a few seconds.
Role for verified users
The verified role is the foundation for your users. This is the role that will be applied to users that successfully complete the verification process.
Attempting to use @everyone as the verified role will break the verification system as the role cannot be given or taken away, consequently manually verifying everyone that attempts to verify. Do not use @everyone.
Channel for logging
Select a channel you prefer logs to be sent to. These logs will be a collection of Successful Verifications (if the option is enabled later), Alt Detections, and VPN Intrusions. These logs are persistent and are not deleted by the bot.
It is recommended that viewing access to the logging channel be restricted to your server staff, but it is not required.
Last updated